How Draw a Straight Line With Gimp
Being able to draw a perfectly straight lines may sound like a trivial task, but doing so in a raster-based environment (such as GIMP) can be surprisingly perplexing to some as it's somewhat of a hidden feature. In this tutorial we'll be going over two different ways in which you can draw a straight line with GIMP, using paths as well as brush strokes.
In short, you can draw a straight line in GIMP by using the Paths Tool to draw a straight path, and then stroke the path.
This can also be accomplished using the Pencil or Brush tool and holding Shift on your keyboard before clicking on the canvas. The benefit of this method is that it allows you to lock your lines onto a horizontal or vertical axis. Let's dig in!
Draw A Straight Line with GIMP
The following video tutorial will walk you through both processes for drawing straight lines with GIMP:
Continue on for the written instructions.
Option 1: Draw straight lines using the Paths Tool
Let's first go over how to draw a straight line using the Paths Tool, which can be accessed in your toolbar or by pressing the letter B on your keyboard.
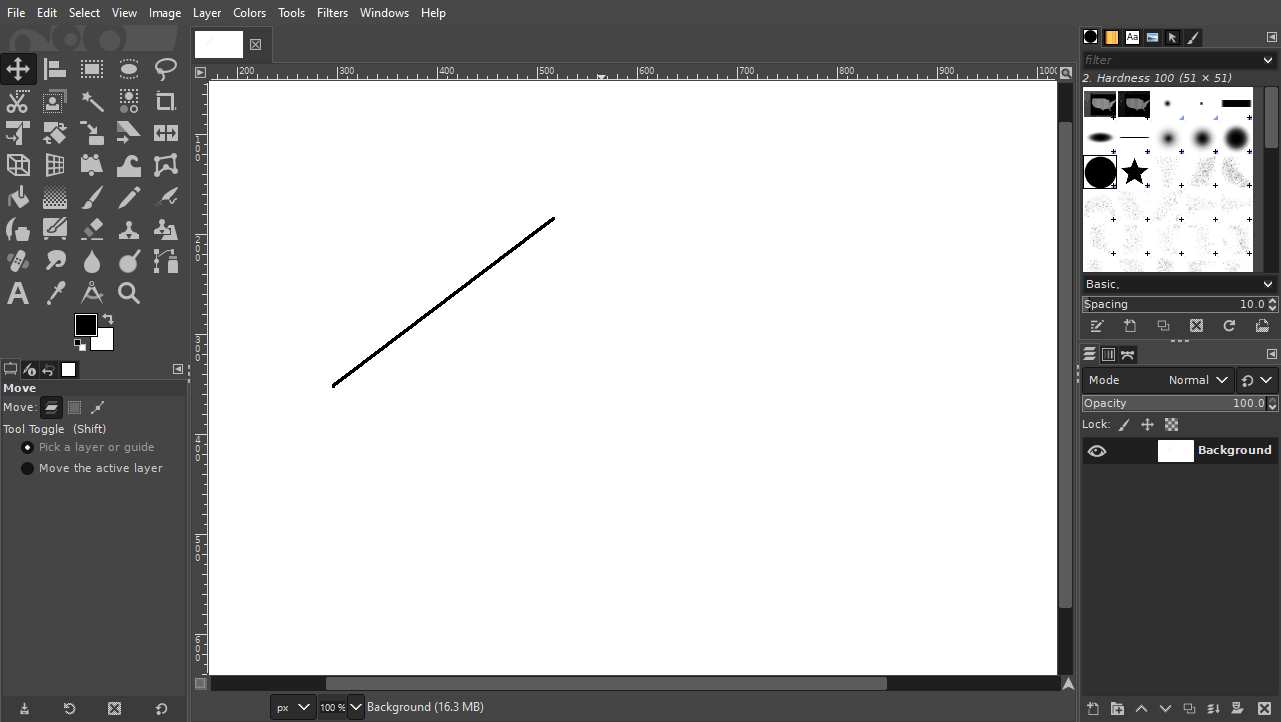
With the Paths Tool enabled, click on your canvas to create a point. This point will represent the starting point on your line:
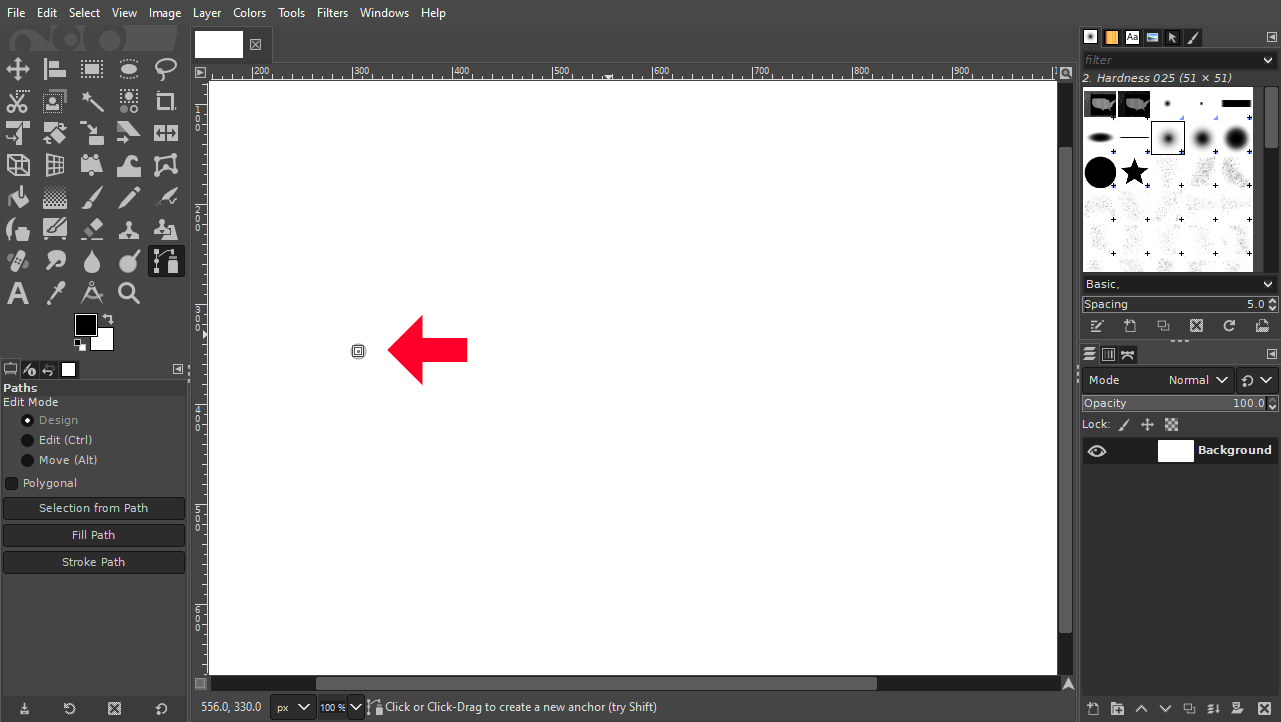
Now bring your cursor over to where you'd like the second point to be and click to place it. This will represent the endpoint of your line.
The tool will automatically place a line between these two points:
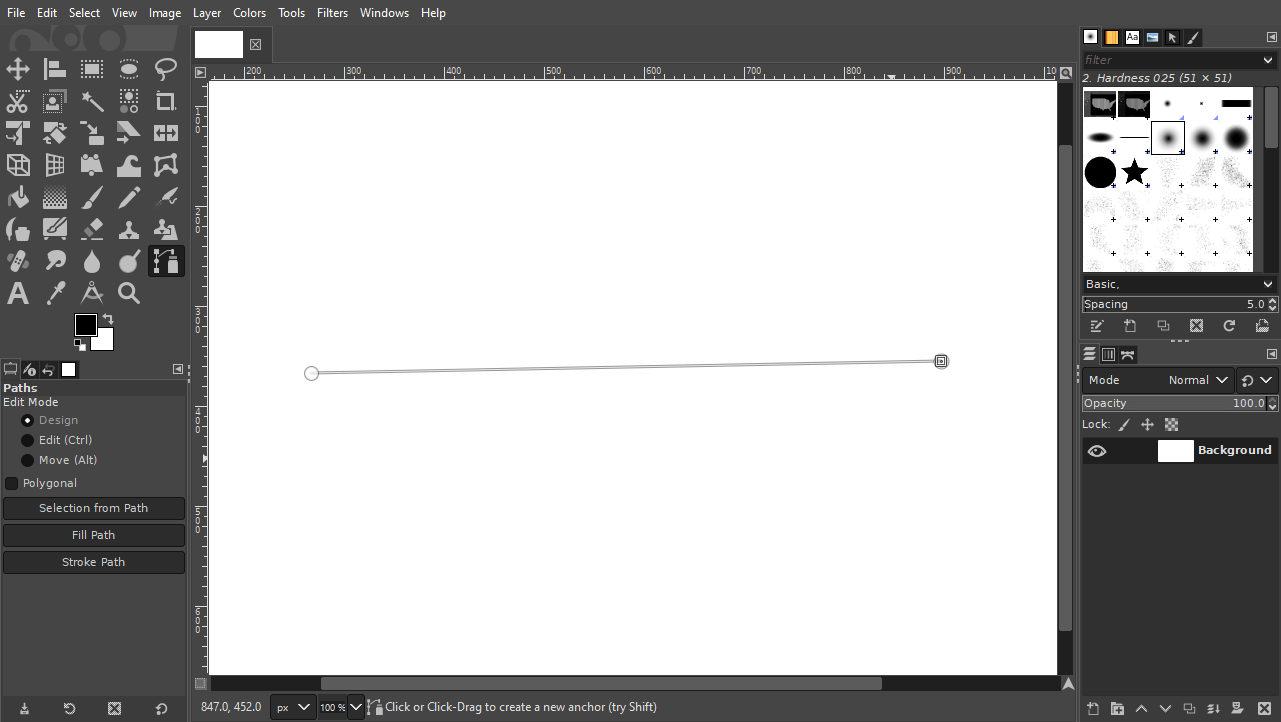
However, this line is not part of the design. It's essentially a visual guide. To make this guide (or path) into a line we'll have to apply a stroke to it using the Stroke Path feature.
To access it, navigate to:
Edit > Stroke Path
The menu should look something like this:
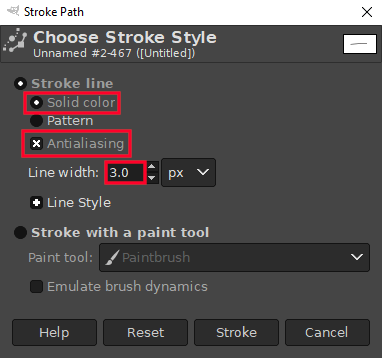
The presets chosen in the screenshot above are as follows:
- Stroke line: Solid color
- Antialiasing enabled
- Line width: 3 px
The Line Width value represents the thickness of the line that will be drawn. You can increase or decrease this size to suit your own needs.
Once applied, press the Stroke button, and a stroke (in the color you've chosen as your foreground color) will be generated along your path:
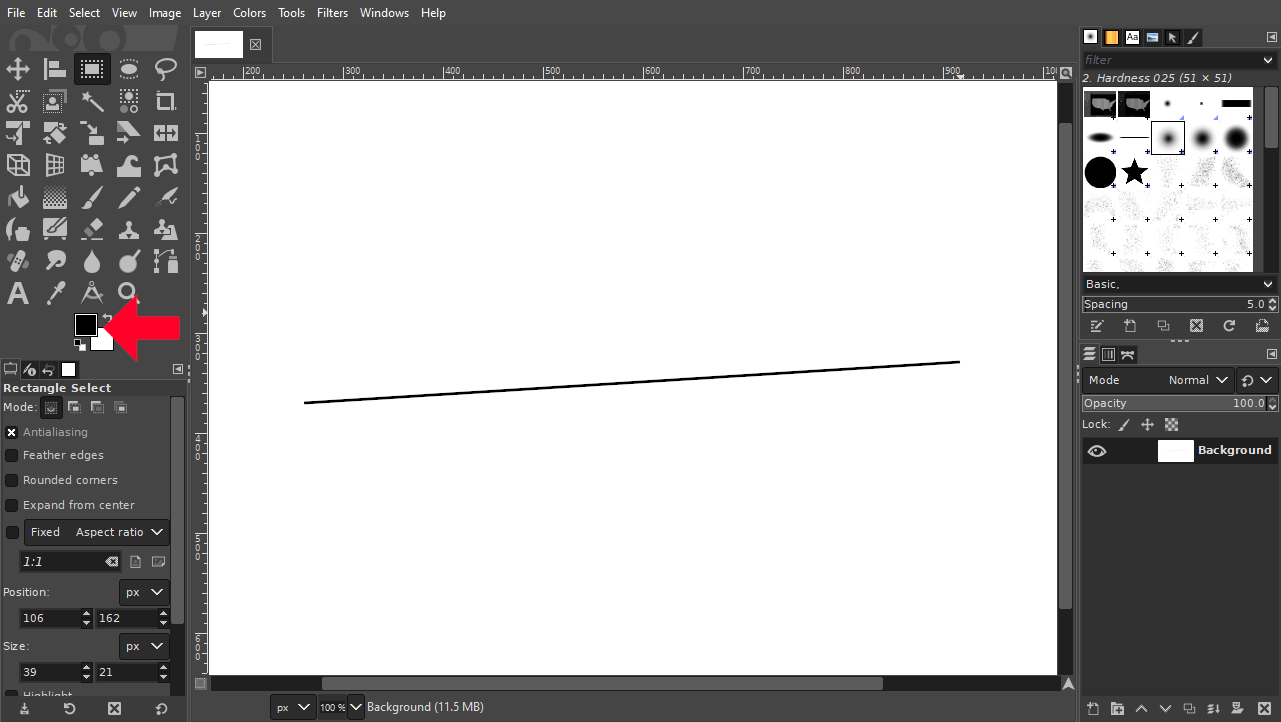
You may have to deselect the Paths Tool to get rid of the guide/path in order to see the straight line you've drawn with GIMP.
Option 2: Draw straight lines using the Shift key
Now let's go over a different method in which the Brush Tool and Pencil Tool can be used to draw a straight line with GIMP.
Typically, when you draw a line with the Brush or Pencil tools, it's rarely perfectly straight. This is because the line follows the path of your hand movement, which usually isn't a perfectly straight. However, there is another way to draw with these tools, allowing you to draw a straight line if need be.
Let's use the Pencil Tool (keyboard shortcut: N) for example.
Hold Shift on your keyboard and click once on your canvas to create a point. There should now be a guide line originating from the spot of the point that tails your mouse movement:

While still holding Shift, simply click again to create another point, which will then complete your line:
While drawing, you can hold the Control key to lock the line onto the horizontal or vertical axis to draw perfectly straight line:

You can also draw diagonal lines using this method as well as your lines will be locked into 15 degree increments.
This method can also be repeated using the Brush Tool (keyboard shortcut: P) which will also allow you to draw a straight line with GIMP using brush settings of your preference. Check out my tutorial on how to use those tools if you need further assistance.
Which Is Better?
The benefit of using the Path Tool method is that you can change the thickness of your line after it's been drawn, if need be. Changing the thickness when using the Pencil or Brush tools would mean undoing/erasing the line and starting over with a different brush thickness.
On the other hand, the benefit of using the Pencil/Brush tools is that you can lock your lines onto 15 degree angles if need be.
If you have any questions or need clarification on any of the steps taken in this lesson, simply leave a comment below.
Become A Master Of GIMP!
Want to learn more about how GIMP works? Check out The GIMP Series – a comprehensive collection of over 60 videos where I go over all of the major tools, features and functions in GIMP and explain what they do, how they work, and why they're useful.
Logos By Nick LLC is a participant in the Amazon Services LLC Associates Program, an affiliate advertising program designed to provide a means for sites to earn advertising fees by advertising and linking to Amazon.com. As an Amazon Associate I earn from qualifying purchases. Read affiliate disclosure here.
How Draw a Straight Line With Gimp
Source: https://logosbynick.com/draw-a-straight-line-with-gimp/
0 Response to "How Draw a Straight Line With Gimp"
Post a Comment